| Tool Box |
Brightening Teeth
To do whiten teeth you need use different tools on the tool box. I have the ones that I used circled in different colours to give you an idea of what each tool looks like.
 |
| Step One & Two |
Step One: First zoom into your subject's teeth with the zoom tool. (Circled in green on toolbox.) This helps you see the colour of the teeth better, and allows you to get a better idea of what you are changing. Then you grab the lasso tool (circled in red on toolbox), and you draw around the teeth. It doesn't have to be perfectly outlined, so you can do this step very quickly.
Step Two: On your layer palette, select the Hue/Saturation option. After you do this a Hue and Saturation bar opens up.
 |
| Steps 3 & 4 |
Step Three: By the option that says Edit it is set to the option Master. Click on the arrows and select the Yellow option.
Step Four: After you turn the edit option to yellow, take the saturation bar and drag it all the way down. As you do this, you can look at the teeth you are editing and you can see that you took the yellow in your subjects teeth completely away!
 |
| Step Five & Six |
Step Five: Now that you have taken the yellow out of your subjects teeth, you might as well brighten them . Go back to the edit option, click on the arrows and select the master option.
Step Six: After you switched the edit option to master, bring up the lightness a little. Do not turn it uo really high because you do not want your subject's teeth to look unnaturally white. If you watch the teeth while you adjust the lightness you see that the whole area that you had lassoed lightens up. Don't worry about that, it is suppose to happen! There is a few more steps that will take that right out!
 |
| Step Eight |
Step Eight: Then go to the top of your screen and select Edit and then the Fill option. After you do this a fill box pops up. All you have to do is click on the arrows by the Use option, and select the Black option. This will fill in the lightened spot on your image, which makes your teeth go back to yellow again.
Step Nine: To get your teeth white and shiny again, grab the paintbrush tool (circled in yellow on toolbox) and paint your teeth. This will make the white and shiny again. (On picture labeled Step Nine, I painted the left side of miranda's mouth so you can see what the paint brush does if you compare it to the right side of her mouth.) And that is all you have to do!
 |
| Step Nine |
 |
| Before and After shots of Miranda's brightly new teeth. |
Brighting eyes:
 |
| Tool Box |
 |
| Step One & Step Two. Before and After shots of colouring the white part of Miranda's eyes. |
 |
Step Three. Before and After shots of Miranda's brightened eye. |
Step Two: Once you've selected the dodge tool, the settings at the top left hand of the screen change. The settings you will be changing will be the brush size, and the exposure. First change your exposure to something low, like 12%. The take your dodge tool and colour the white part of your subjects eye. Change your brush size to a size that fits the white areas of the eyes.
Step Three: After you have coloured the white parts of the eye, change your exposure to something higher. I changed mine to 25% but you can go higher. Then colour the colour part of the eye, not including the pupil. And viola! Your subjects eyes are much brighter.
Fun fact! If you ignore the tutorials advice and don't change your exposure to a lower setting, you are going to make your subjects eyes VERY bright... which is as you can see by Miranda's eye is not a very flattering look! So do not forget to change you exposure settings like I did, otherwise you could get very alarming eye results.
 |
| Here are the before and after pictures of my edit to Miranda's eyes. If you get a close look you can see that her eyes are a bit bluer. I am hoping the next portrait i take will have a close up of someones eyes so you can see a more clearer difference. |
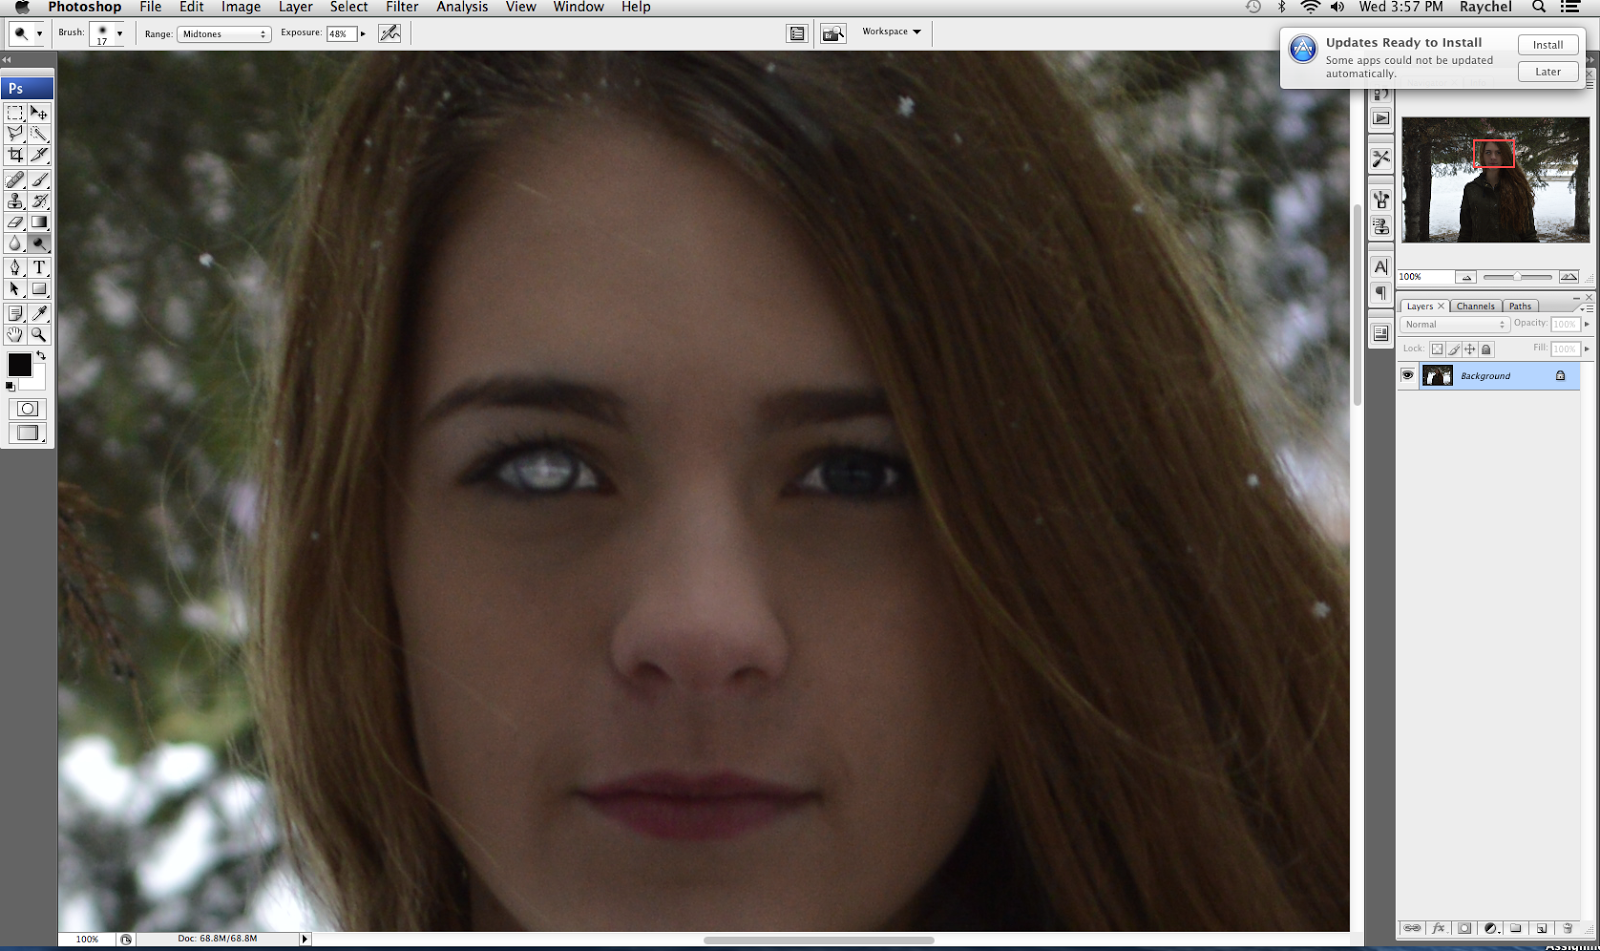
Blurring the Background of a Picture:
Another thing I've really been wanting to learn is how to blur the background in pictures. So I took another portrait of Miranda and figured it out! (With youtube's help of course)

Step One: On the layers palette you see a tiny image of the picture that you have opened in photoshop titled "Background". This is the background layer, everything you will change to your picture will change also on this layer. To blur the background you need to duplicate the layer. To do this, you left click on the background layer.
Step Two: after you left click on the mouse, some options will pop up. you need to select duplicate Layer. this means that anything you change to the picture will be put on the background layer AND this layer. If you were to delete this layer however, the changes that have been made will be deleted from the background layer as.
Step Three: If you have two tiny pictures of you image, you have completed step two correctly. Make sure to be on the background copy layer when doing the next few steps.

Step five: A Gaussian Bar will pop. In the pixels box you type in a number that will control how blurry your image is. the higher the pixels you type in, the more blurrier of a image you will get. After you hit okay, your whole image will be blurry, even your subject.

Step six: To get your subject back into focus you take the eraser tool on the tool box, and start erasing over your subject. You are erasing the blur away, and getting your in focus subject back! As you can see on this picture of Miranda, I started erasing her face making her face look in focus once again.
 |
| Before and After! |
Here are a list of the links I used to learn about these edits:
http://youtu.be/uDcepzxGb98
http://youtu.be/uDcepzxGb98
No comments:
Post a Comment